![]()
CQC
![]()
CQC

(Click here for the related CommandPost article.)

Click on any of these images for a larger view
Mission:
To create an attractive and durable control panelwith neat labeling for the N1FN CW CommandPost.Basics:
A computer program is used to generate a printedlabel for the panel. The label is also used as a drilling template to mark and punch the locations of holes for controls. I used Corel Draw v8.0 for Windows. You can use any graphics program that will print drawings in actual sizes. For example, I can draw a 1" squarewith the program and have it print exactly 1" square.Materials:You will also need a graphics printer. In version one of this label I used an ink jet printer, but ink jet inks are fugitive,i.e. can be smeared with moisture. In the second version. detailed here I used a laser printer.
If you don't have an appropriate computer, program, or printer, it may be possible for you to use one at Kinko's or your local public library.
Self adhesive label material, e.g. Avery 5165Self adhesive clear plastic, e.g. Avery 9x12 LaminatingSheets
Procedure:1. Create the drilling template and drill thepanel.
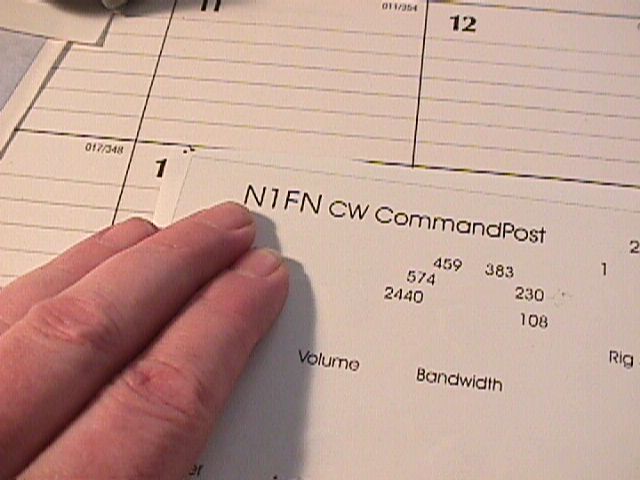
In the drawing program, draw a rectangle to the exact dimensions of the panel you are using. Print the rectangle on plainpaper to verify that it is the right size.
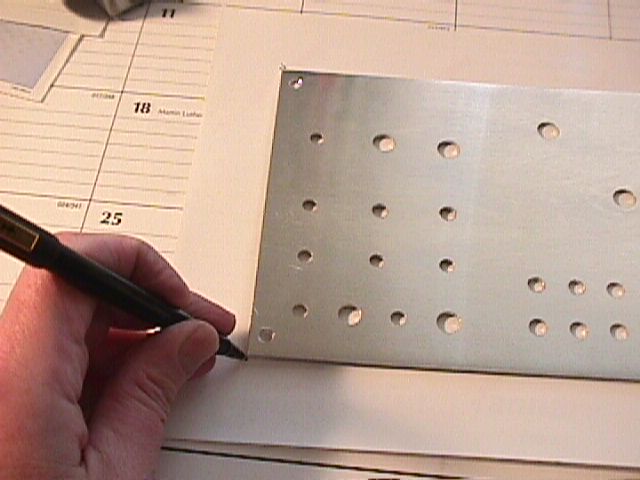
In the drawing program, mark the locations of holes with the letter "x." Use the program's rulers and guidelines to locate the holes precisely. Print the drawing on plain paper. With a pen or pencil, indicate next to each "x" the size of the hole to be drilled.
Place the panel on the printed drawing and use a pen orpin punch to mark the four corners. Apply a small amount of rubber cement and stick the drawing to the panel. Use a center punch ornail to punch the center of each "x" or hole location. This is necessaryto keep start the drill in the exact location and keep it from wandering.
Start with a drill for the smallest hole required (or1/8" if no smaller holes are needed). Drill ALL of the holes to that size. Select a drill for the next largest size, and drill out all of the holes for that size or larger.
Continue until all of the holes are done. De-burr the holes on the reverse side of the panel with a "rosette" countersink bit, or a round file, or a sharp knife (if you're working in aluminum).2. Create the label.
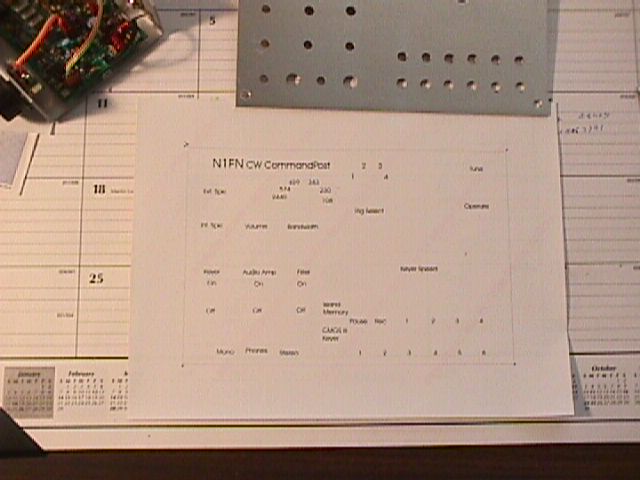
Go back into the drawing program and letter each controland add any desired artwork, using the "x's" to reference the locations of the controls.
Delete the "x's" from the drawing if you want to, or ifthey are larger than the holes that they mark.
Print the label on self-adhesive label material.
Click on any of these images for a larger view2. Apply the label to the panel.
Lay the panel face up on the table and place the labelon top of it. Move the label as needed so that the square outline (the rectangle you drew in step 1) matches the panel underneath. Use a pen or pencil to mark "dots" at the four corners, pressing firmlyinto the label material but being careful not to tear it.
Turnthe label over and mark the back side of the four corner dots by pressing with a pen again. This is to be sure you will be able to see thecorner marks once you remove the backing from the label.
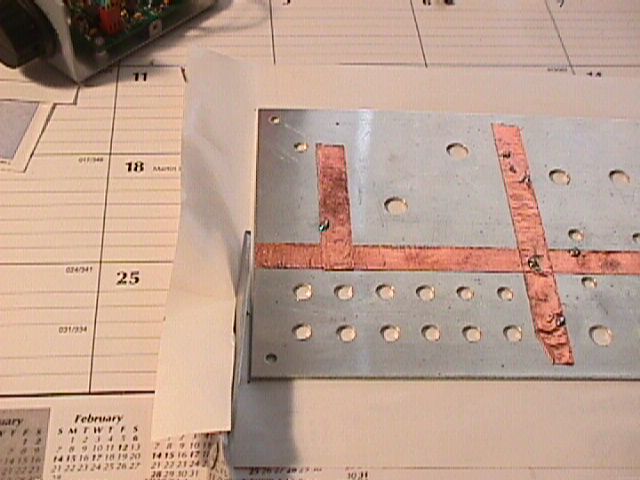
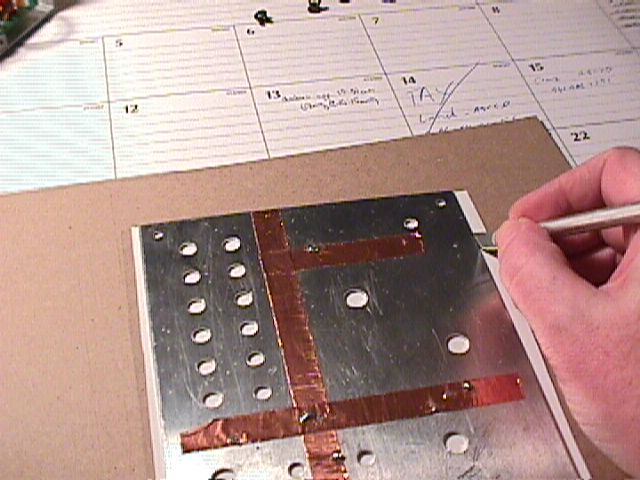
Removethe backing from the label and lay it on the table adhesive side up. Carefully position the panel on the label and press down firmly. At this point, if the label is much larger than the panel, you can do a rough trim with scissors. In the illustration, the copper strips on the back of the panel are foil tape used for ground connections (remember,this is a replacement panel for the N1FN CW CommandPost!).
Turnthe panel over and rub the label all over to remove any air bubbles andinsure firm adhesion at the edges of the holes and the edges of the panel.
Apply the clear plastic overlay (laminating plastic) andpress it firmly to the label. Again, you can rough trim with scissors if necessary.
3. Trim the label and clear the holes.
Turnover the panel (with label and plastic cover attached) so that it is facedown on the table. Using the edges of the panel as a guide, use a sharphobby knife to trim the label and plastic right up to the edge of the panel.
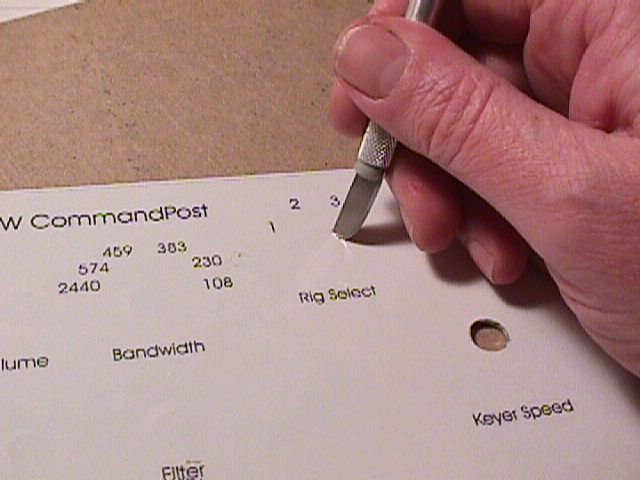
Createthe holes in the label and plastic by carefully trimming out the centerwith a sharp hobby knife. A knife with a curved or rounded blade works well for this. I use a vertical sawing motion (like a sewing machine)to work my way around the hole. Take your time, and be sure that the cutsare clean because ragged bits of paper or plastic will catch when you mountthe controls later and mess up the whole job! If you have any countersunk holes (e.g. the four screw holes at the corners for mounting the panel to the box) you will find that a straight blade works better, as it follows the taper of the hole better.
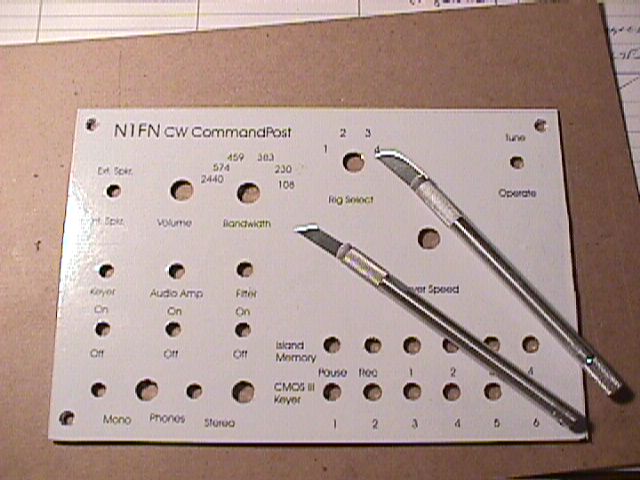
Here'swhat the panel looks like when you are done-- note the shapes of the blades used for straight holes and countersunk holes, as described above.
EtVoila! Here's the completed unit with the panel in place. Sorry about the glare from the lamp-- I'll replace the picture when I get a chance.
Return to CQC Library Page

CQC Webmaster
Roger J. Wendell, WBØJNR
About | Contact | Home | Join | Meetings & Events | Members | Merchandise | Newsletter | Site Index |
Copyright © 1994 -